Concrete Contractors

Elevating Your Outdoor Spaces With Stamped Concrete

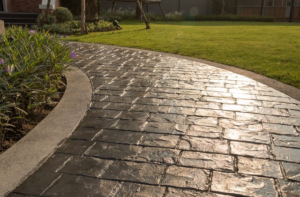
Imagine stepping onto your back patio and being greeted with the rich texture of Stamped Concrete Dallas designed to look like rustic flagstone. Or, picture a winding walkway that mirrors the elegance of natural cobblestone.

This style of outdoor flooring has gained popularity in recent years for its versatility, durabilit, and added value to your home.

With a variety of colors, patterns, and textures to choose from, stamped concrete offers endless opportunities for customization. It can be designed to resemble other materials, such as natural stone and brick, or it can be made to look more modern with geometric designs. Its versatility allows homeowners to find a style that suits their aesthetic preferences and complements the architecture of their homes.

Stamped concrete comes in a wide range of patterns and color options, making it the perfect choice for outdoor patios, pool decks, walkways, driveways, and more. It can be molded to look like running bond brick, worn rock, stone, hexagonal tile, and more. For added appeal, it can also be stained and sealed. This process enhances the appearance of the concrete and makes it more resistant to stains, abrasions, and UV rays.

When choosing a color for your stamped concrete, it is important to consider how it will look with other elements in your landscape. For example, if you have a lot of greenery in your yard, consider using earthy tones that will compliment and blend with the colors of your trees and shrubs. You can also use color hardeners during the stamping process to create a more natural appearance, by adding streaks of different hues that mimic the shading and color variation found in stone.

Another option is to incorporate stencils and hand-colored designs into your stamped concrete. Stencils are popular for creating a focal point on a patio, such as a family crest or sports team logo. Stencils can be painted or spray-painted on the concrete, and they will not fade with exposure to sunlight.

Once the concrete has been stamped, it is important to seal the surface to protect it from stains and damage. There are two types of sealers available: topical and penetrating. Topical sealers sit on top of the concrete, while penetrating sealers enter the pores and help to prevent fading. By regularly cleaning and resealing your concrete, you can ensure that it will last for years to come. For more information about customizing and maintaining your new stamped concrete, contact the masonry experts today!

Durability

Many homeowners want to improve the look of their outdoor spaces. But the typical options like flagstones, bricks and tiles are expensive and require a lot of maintenance. One solution that combines affordability, durability and aesthetics is stamped concrete. This innovative paving material can replicate the look of stone, wood and other materials at a fraction of the cost. And unlike traditional paving materials, it can be poured and stamped over existing surfaces without costly extraction.

Stamped concrete is also highly versatile in terms of its design options. Homeowners can choose from a variety of textures, colors and patterns to create a unique patio that complements their home’s architectural style. From the rustic charm of cobblestone to the sleek sophistication of slate, stamped concrete offers a wide range of popular designs.

With a little help from your contractor, you can also customize your stamped concrete project to suit your specific needs. To start, you’ll need to select the desired pattern and color of your concrete. Next, the contractor will prepare the area and pour the concrete. They’ll then use a special stamp to imprint the concrete with the chosen design. A release agent is then applied to prevent the stamp from sticking to the concrete and creating an uneven surface.

The stamped concrete will then be washed and sealed to protect it from water damage and other environmental factors. You can keep your stamped concrete looking new by cleaning it with mild detergents or soap and water on a regular basis. It’s important to avoid using abrasive cleaners, which can cause the concrete to crack or chip. You may also need to have your concrete re-sealed on a yearly basis, depending on how heavily it’s used.

While it’s possible to install a stamped concrete patio yourself, we recommend hiring a professional to ensure the job is done correctly and safely. There are a lot of things that can go wrong during the installation process, from misjudging the concrete mix to gauging the right time to begin stamping the concrete. Hiring a professional will save you money and eliminate the risk of a disastrous DIY patio project.

Low-Maintenance

The best part of stamped concrete is that it requires very little maintenance to keep it looking its best. A few simple steps like sweeping, hosing off, and resealing every couple of years will help protect it from weather and staining. This is a great benefit for those who don’t want to deal with the upkeep of traditional materials, such as pavers or natural stone, in their outdoor spaces.

The stamping process can be done with a variety of different patterns and colors to create a unique look. Some of the most popular options include brick, stone, slate, wood, and textured (cobblestone or tile). A concrete contractor can help you choose a pattern that fits your style and complements other elements in your space.

Once the concrete is poured and colored, the stamping can be done while it’s still wet. It’s important to use a release agent before stamping, so that the concrete doesn’t stick to the stamps and tear. Once the concrete is pressed into the stamps, it’s then topped with a water-repellent sealant to prevent damage.

If you do notice a stain, a bit of elbow grease and a diluted acidic cleaner should work to break it down. Just be sure to rinse the surface thoroughly afterward. If the stain is caused by oil or other chemicals, it’s a good idea to use a concrete stain inhibitor that has hydrophobic properties. This will keep the chemicals from etching or damaging the concrete and can even extend the life of the sealant.

As with any type of paving material, stamped concrete can become damaged over time, especially if it’s exposed to a lot of traffic or the freezing and thawing cycles that happen during the winter. In these cases, it may be necessary to repair cracks or damaged areas as soon as possible.

Ultimately, stamped concrete is less expensive than the materials it mimics, making it a cost-effective option for homeowners and businesses alike. It can also be much easier to maintain than other paving materials, making it the ideal choice for busy areas.

Eco-Friendly

Unlike traditional pavers and slabs, stamped concrete is an eco-friendly paving option. This is because it utilizes a recycled material that would otherwise have been discarded as waste. Plus, it is less expensive than materials such as flagstone and brick, while providing a high-end look. Whether you are designing your patio, pool deck, driveway or walkway, it’s important to choose the right material for the job. While many homeowners opt for stone, pavers or bricks, these materials can be costly and require extensive maintenance. For those looking for a more budget-friendly and low-maintenance solution, stamped concrete is an excellent choice.

As the name suggests, stamped concrete is a type of decorative concrete that has been imprinted with a pattern or design. The process is similar to regular concrete, but the result is a unique and beautiful paved surface. There are a variety of patterns and colors available, so you can find the perfect match for your home. Choosing the right color and design will also help to create a seamless transition between your outdoor living spaces and your interior decor.

When it comes to eco-friendly paving, stamped concrete is one of the greenest options out there. It is made from recycled concrete and Portland cement, so it’s an environmentally friendly alternative to other paving materials. It is also less expensive than other paving materials, and it is easy to repair. Additionally, stamped concrete doesn’t require the use of chemical products or de-icing salts, which are harmful to the environment.

Stamped concrete is also highly customizable, so you can choose a design that will complement your landscape and home. You can even select a colored concrete mixture that matches the color of your home or other outdoor features like your driveway or pool. This allows you to create a custom, one-of-a-kind patio that will make your home stand out from the rest.

When it comes to cleaning and maintaining your stamped concrete, regular sweeping and occasional pressure washing with a garden hose or power washer will keep it looking new. It’s also a good idea to apply a color sealer every two to three years. This will protect the surface from weathering, dirt and other environmental factors that can cause damage over time.

AC Repair

AC Repair: Troubleshooting and Diagnosing Common AC Problems

Throughout the summer, your air conditioner works hard to keep your home cool. Unfortunately, it may occasionally experience minor issues that require the help of a professional.

Fortunately, scheduling AC maintenance twice a year can minimize the number of repairs your system requires. Here are five common problems that AC Repair technicians see and address. Contact AC Repair Encino now!

The blower fan inside your indoor unit and the condenser fan in your outdoor unit both use motors to operate. If these motors start to go bad, your AC system may struggle to cool your home. Fortunately, the problem is usually easy to diagnose and fix. If the fan isn’t working at all, it’s pretty clear that something has gone wrong with the motor. On the other hand, if you can’t feel air coming out of the vents, there could be a few different issues that need to be addressed.

One common reason for a failing fan or blower is a clogged air filter. If you’re not changing your air filters regularly, a dirty filter can cause the blower to slow down or stop moving altogether.

A more serious issue is a burned-out motor. This can happen if you don’t keep up with regular annual or biannual maintenance services. It can also be caused by overworking the motor, which causes it to overheat and burn out.

Lastly, if the fan isn’t turning, the problem is most likely in the compressor or contactor. The contactor regulates power flow to the motor, and if it’s not functioning properly, the motor will not turn on. To check the contactor, you’ll want to start by checking that the switch is on. If it is, the next step is to go outside and listen to see if the fan in the outdoor unit is running. If the fan in the outdoor unit is not spinning, it’s most likely a contactor issue and you’ll need to call for an AC repair service.

If you can hear the fan in the outdoor unit buzzing but it’s not spinning, you should do a visual inspection to make sure the fan isn’t stuck. It’s possible that it’s obstructed by a tree branch or something similar, which is an easy problem to fix by simply clearing the obstruction.

If the fan in the outdoor unit is obstructed by dirt or other debris, you should not try to open the unit and insert anything into it yourself. This is a job that should be left to an experienced AC repair technician, who can easily clean or replace the fan.

Failing Contactor

There are many electrical parts in your air conditioner, and they all must work together to make it throw cool air. Unfortunately, even the smallest of the components can cause a big problem when they fail. Two of the most common AC problems are a failing capacitor and contactor. These two electrical tag team members work hard to power your AC, and they can be relatively inexpensive to replace or repair if you catch them early.

A failing contactor can often be identified by unusual noises coming from your AC unit. Chattering and humming noises can be the result of a poorly functioning contactor, and they are caused by the rapid movement of metal coils, plungers, and contacts. This type of issue can lead to energy waste and potential damage to other components in the unit if left untreated.

Other signs of a poor-functioning contactor are an unresponsive air conditioning system and signs of overheating components. A contactor that fails to open or close properly will prevent the flow of electricity to the compressor and fan motor, which can cause them to overheat. In addition, a faulty contactor can also fail to shut off the AC when instructed by the thermostat.

You can test the condition of your contactor with a multimeter. Using the meter on the OL (open loop) setting, connect one of the leads to the contactor coil and another lead to the ground terminals. A proper reading should be in the range of 10 to 100 ohms. A higher reading indicates that the coil is bad, and a lower one means the contactor is not functioning correctly.

Visual inspection of the contactor control switch can also reveal the need for a replacement. Burnt, melted, or pitted contact surfaces are typically an indication that the switch is experiencing severe electrical arcing. In addition, a charred or melted casing can indicate that the contactor has been exposed to high levels of heat for an extended period of time. A qualified HVAC technician can determine the source of the failure and recommend an appropriate solution.

Failing Capacitor

A capacitor is the electronic device in your air conditioning system that gives a boost of power at the beginning of each cycle to bring the fan motor up to speed. Like all other electrical and mechanical devices, capacitors are prone to failure over time. When they start to go bad, you may notice a few common symptoms.

One of the most obvious bad AC capacitor symptoms is a lack of airflow from your vents. Your AC isn’t running properly, and this problem is going to make you uncomfortable in your home. Another symptom is a humming sound. This is a sign that your capacitor is struggling to start the compressor and fan. A failing capacitor can damage these expensive components, so it’s important to get it replaced right away.

The first step in fixing a failing capacitor is to turn off the electricity at your unit’s service panel. This will prevent any unwanted accidents from occurring while you’re working on it. Then, use a screwdriver to open the service panel and find the capacitor. It’s usually a metal cylinder with two or three terminals on the top and wires attached to them. Once you locate it, do a visual inspection to check for any signs of trouble.

Look for any bulging, cracks or oil leaking from the capacitor. If you see any of these issues, it’s a good idea to call in an HVAC specialist as soon as possible to replace the capacitor.

It’s a good idea to buy a spare capacitor for your AC so that you can have it on hand in case of emergency. Then, you can have a professional install it for you so that your air conditioner is back up and running as quickly as possible.

A multimeter can be used to test a capacitor. The process is fairly straightforward: you just need to connect the ends of the capacitor to a voltmeter and check for an output of electricity. The capacitor needs to be discharged before it can be removed and replaced, so you’ll want to be sure to wear safety gear and take precautions to protect yourself from any accidental electric shocks.

Failing Condenser Fin

The AC condenser is where warm refrigerant passes its heat to the air outside of your building. During this process, the cooling fins on the top and bottom of the unit can bend or become damaged which restricts air flow and reduces efficiency.

Air conditioner repair technicians use a special tool called a coil fin comb to straighten bent or broken fins. Attempting to do this yourself may cause further damage so we recommend that you consult a professional unless you are confident in your abilities.

A clogged condensate drain tube is another common AC repair issue. The drain tube runs from the outdoor unit to a nearby water drain or floor drain in your home. This tube can get blocked by dirt, algae, or mold and allow water to leak inside your air conditioning system. If you notice a puddle on the ground near your condenser unit or hear a hissing noise, contact a professional immediately to check out your air conditioning system for a possible clogged condensate drain.

Electrical failures are a more serious problem that usually requires professional AC repair. The relay switches, capacitors and wiring that power the motors on the fan and compressor can all fail, causing your air conditioner to stop working altogether. Professional technicians will need to diagnose the specific problem with these components and replace them as needed.

An AC condenser that is over ten years old will likely require a replacement. A faulty condenser can drastically affect your energy bill and it’s usually more cost effective to invest in an entirely new air conditioning system that will provide you with many years of reliable service.

Performing your own AC repairs can be time consuming and expensive. The best way to save money on AC repairs is to prevent them by keeping up with routine maintenance. To do this, start by clearing the area around your outdoor unit and trimming any bushes or tall grass that might come into contact with it. It’s also a good idea to build a fence or gate around your unit to keep pets, lawn mowers and other debris out of the cooling system. A well-placed fence will also help to deter vandalism and other types of damage that can be very costly.

Cleaning Services

Insulation Remover – How to Make it Easier and Safer for Yourself

Blown-in insulation is a popular choice for homes, but it can pose challenges when you need to remove it. The process is messy and requires the right gear to keep yourself safe. Contact Perth Insulation Remover now!

A powerful insulation removal vacuum is the main tool you’ll need. Also, make sure you have a ladder that’s tall enough to reach the attic and heavy-duty bags to dispose of the materials in.

Insulation removal is a process in which old insulation is removed and replaced with new, more effective insulation. This is usually done in homes or other buildings, as part of a renovation project. It is a quick and relatively inexpensive way to improve your home’s energy efficiency and reduce environmental impacts. However, it is important to understand how this process works before you hire someone to do the work.

The first step in the process is to identify the type of insulation you have in your home and determine if it is safe to remove. Cellulose and fiberglass insulation are the two most common types of insulation used in houses. Both have their own unique qualities, but cellulose is more difficult to remove. This is because it is more likely to contain mold and other contaminants. Therefore, it is advisable to have it professionally removed.

The preferred method for removing blown-in insulation is to use a vacuum process. This requires a large vacuum hose to be fed into the attic space and then removed. This allows the contractor to remove all the old insulation and prevent it from being tracked throughout your house. It also eliminates the risk of contaminating other areas of your house with airborne contaminants like rodent droppings and mold.

During the insulating removal process, you should clear all vents and turn off any electrical systems in your attic. This will prevent you from damaging any electrical wiring and create a safer working environment. It will also minimize the chance of accidental contact with live wires, which could cause electrical shock and damage to appliances.

If the insulation is contaminated with pests or mold, it should be carefully rolled up and bagged. These bags should be securely sealed to prevent the release of airborne toxins and other pollutants. The bags should then be transported to a designated waste site for disposal. If the bags are not properly bagged, they can contaminate the rest of your home and aggravate allergies or respiratory conditions.

If your insulation isn’t contaminated with pests or mold, it may not need to be removed. You can instead replace it with a less invasive option, such as injection foam insulation. This method is less expensive than tearing down walls and provides a much better energy efficiency. It can also save you money on your utility bills, as well as protect against moisture, mildew, and wood rot.

Safety

Insulation is a vital part of homes and commercial buildings, keeping them warm in winter and cool in summer. However, old or damaged insulation can cause moisture problems that lead to mold growth and structural damage. This is why it’s important to replace it with new, quality insulation as soon as possible. To do so, you’ll need the right tools and safety equipment. Fortunately, there are several ways to make this task easier and safer for yourself.

Before starting your project, it’s a good idea to clear out any items in the attic to create a workspace that is free of potential hazards and distractions. Moreover, it’s also important to wear the right protective gear. This includes goggles, dust masks or respirators, and gloves. These protect you from loose insulation fibers, dust, and other airborne contaminants that may irritate your skin or eyes. In addition, a hard hat can prevent your head from being hit by debris during the process.

In addition, it’s important to disconnect any live wires in the attic before beginning your insulation removal project. This will minimize the risk of electrical shock or fire, and help you avoid damaging any wiring or junction boxes. In some cases, it’s best to hire a professional for insulation removal projects that require work near live wires.

Once you’ve removed any contaminated insulation materials, dispose of them in accordance with local regulations. If you’re unsure of how to dispose of certain types of insulation, it’s always a good idea to ask a waste management company for advice. This will ensure that your home or business is compliant with local environmental regulations.

While installing or removing insulation is a DIY job, it’s important to take necessary precautions to protect yourself and others. This is especially true when removing blown-in insulation, which requires special equipment to remove. For example, if you’re using a cellulose or fiberglass insulation, you should use a powerful vacuum to remove it from the attic space. Be sure to wear a face mask and dust goggles, and make sure that the vacuum hose is properly sealed.

Equipment

Before you start the removal process, make sure you have the right equipment and supplies. The most important thing is a powerful insulation vacuum cleaner with HEPA filters to clean up the dust that will be created during the removal process. It should also have a large capacity and a long hose to get into attics and crawlspaces where the old insulation will be sucked out. You should also wear gloves, protective clothing and a mask or respirator when handling the old insulation.

It is also a good idea to spread plastic or a drop cloth across your floor, furniture and other items in the home to protect them from the loose dust that will be kicked up when you remove insulation from the attic. This is especially true with cellulose insulation, which is made from recycled newspaper. The dust it creates can irritate your eyes, throat and lungs and may trigger asthma and allergy symptoms.

Once you have the equipment, it’s important to clear out your attic or other space where the old insulation will be removed before you start. This will help prevent damage to your belongings and create a safe working environment. In addition, you should also turn off the power to your attic and disconnect any live wires. This will reduce the risk of damaging electrical systems or causing an accident while you are handling the insulation.

Different types of insulation require different removal methods and equipment. For example, fiberglass batts and rolls are easy to remove but can release dangerous airborne particles that may lead to dermatitis and respiratory problems. Blown-in insulation can be more difficult to handle, requiring specialized HEPA-filter equipment and special safety precautions. It is also recommended to wear gloves, a face mask and goggles when removing blown-in insulation.

For foam board insulation, it is a simple matter of tearing off the panels and disposing of them in a dumpster or at an approved disposal site. Spray foam insulation, however, is much more challenging to remove and requires a knife, saw or specialized equipment to cut it away.

Cost

The cost of insulation removal will vary based on a number of factors, including square footage, materials, and contamination. On average, the cost to remove old insulation from an attic will range between $1 and $2 per square foot. However, if the attic is particularly large, it can cost more. A professional will also charge for disposal services, which are often included in the overall estimate.

It is important to note that insulation can be contaminated with mold, rodent waste, and other substances. These contaminants can lead to serious health issues, and they must be handled carefully during the removal process. In some cases, the contaminant must be quarantined from the rest of the home for a certain period of time to prevent spread. For this reason, it is typically best to work with a professional, who will use proper equipment and wear protective suits.

Insulation that is contaminated with asbestos, vermiculite, or other dangerous substances can be expensive to remove. Depending on the type of material, the cost could be as high as $15,000. In these cases, it is usually recommended to work with a professional, as they will have access to more advanced equipment and may be able to offer more affordable options for removal.

Old and damaged insulation can cause hot and cold spots in the home, and can reduce energy efficiency. Additionally, it can provide a nesting site for pests, which can harm air quality and create health hazards. In some cases, the insulation may contain mold or animal waste, which can also be harmful to occupants.

Insulation is a major investment, and it is important to keep up with replacement to ensure the optimal R-value in your home. In addition, if the insulation is contaminated with pest waste or other contaminants, it is important to have the removal done by a professional. This can help avoid serious health risks and increase the efficiency of your home, saving you money on your energy bills.